ruben wall
Sunday, 26 April 2020
Week 8
Physical Models - Material Photoshop Activity
For my model, I decided against applying materials to all the sides of my model as I wanted to be able to see the the structure, i wanted to keep the imperfect nature of my handmade models to show a contrast to the material additions
This shows a brick wall and timber floor whilst leaving the vault ceiling and
Experimenting with lighting
WEEK 7 LIGHTING and SCALE + EXPERIMENTATION
THROUGH THE WINDOW MODEL
Experimenting with a single light source helped me create a series of photos which represent what the room looks like at night time .
Through this experimentation i was able to explore the concept of night and day and how you can communicate a certain mood via the lighting you use. This can help the viewer better understand the design aspect of the room by allowing them to experience the room in ways that only someone who lives in the room would.
LIGHTING EXPERIMENTATION
Slanted roof model
GREEN OUTSIDE WINDOWS
The green outside the windows gives the room a nice feeling
The blank room looks clean meaning the cathedral style ceiling and clear story windows stand out as the main features of the room. This plain style helps further communicate these design features as they are the only things that stand out in the pain room.
Through Further experimentation i was able to create different moods and time of day. The human Cutout added scale to the design helping communicate the size.
This room is cosy and the human helped communicate that.
Sunset/sunrise
Nighttime with flash
Street lights
Outside perspective
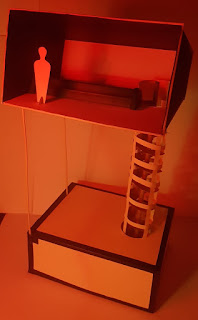
DREAM Bedroom model
I ran out of rooms and too keep it interesting i decided to build my dream room and wanted it to be on top of a hill and have the most amazing sunsets
The human cutout added scale to the design helping communicate the size and hight of the room.
Here you can see the change in size of human changes the size of the model
Saturday, 25 April 2020
Model making Paper vs cardboard
MODEL 1
Using ordinary a3 paper to create a replication of my family living room posed a challenge as the material was very floppy to a degree that it was hard to work with as it would always bend and warp as you where trying to join peices. In the end the peice as a whole took form reasonably well but the size meant that the walls sagged to a degree, in conclusion The paper was much easier to cut with the scalpel , and had a cleaner look but the rigidity and overal workability was poor compared to the cardboard. The scale was 1:10 which made it even harder to put together and more floppy.
MODEL 2
Made using cardboard from 2 cereal boxes , The cardboard scale model of my living room was At a 1:12 scale which made it more workable but was still too big. The cardboard was a much more pleasant experience to make models with as it allowed for a much more stable stucture, this activaty was valuable it giving lessons on what materials are most suitable for the model making.
Tuesday, 25 February 2020
Subscribe to:
Posts (Atom)